Thursday, August 10, 2023

Security Guidelines for Azure Devops


Securing your Azure DevOps environment is crucial to ensuring the confidentiality, integrity, and availability of your software development and deployment processes. While I can provide you with a general security checklist, please note that security best practices may change over time, so always refer to the latest documentation and guidelines from Microsoft.

Below are the main points for  securing Azure Devops 

1. Managing users and groups using Role-Based Access Control (RBAC) to define and enforce granular permissions.

Role-Based Access Control (RBAC) is a method of managing user access and permissions
based on their roles within an organization. It helps maintain security by ensuring that users
only have access to the resources and operations relevant to their job responsibilities. In
Azure DevOps, you can use RBAC to assign appropriate permissions to users and groups.

2. Applying the principle of least privilege for granting permissions to minimize potential risks.

The principle of least privilege (PoLP) is a security best practice that involves granting users only the minimum permissions they need to perform their job duties. By applying this principle, you can reduce the risk of unauthorized access, data breaches, and other security incidents.

3. Regularly reviewing user accounts and disabling unnecessary accounts to reduce the attack surface.

Regularly reviewing user accounts and disabling unnecessary accounts is essential to maintain a secure environment in Azure DevOps. By keeping user accounts up to date and removing unused or inactive accounts, you can minimize the risk of unauthorized access and data breaches

4. Implementing strong authentication with Multi-Factor Authentication (MFA) to protect against unauthorized access.

Implementing strong authentication with Multi-Factor Authentication (MFA) is a critical security measure that helps protect your Azure DevOps environment from unauthorized access. MFA requires users to provide at least two forms of verification before granting access, making it much more difficult for attackers to compromise user accounts

5. Integrating centralized identity management using Single Sign-On (SSO) and Azure Active Directory.

Providing centralized identity management using Single Sign-On (SSO) and Azure Active Directory (Azure AD) integration simplifies access control and enhances security in Azure DevOps. SSO allows users to authenticate once and access multiple applications, while Azure AD integration enables centralized management of user accounts and permissions

6. Reducing authentication risks using risk-based policies and Azure AD Identity Protection integration.

Reducing authentication risks with risk-based policies and Azure AD Identity Protectionhelps enhance security in Azure DevOps by detecting and responding to potential threats in real-time. Risk-based policies evaluate user behavior and other factors to identify potential security risks, while Azure AD Identity Protection leverages machine learning algorithms to detect suspicious activities

7. Restricting access with IP-based network security groups and private networks.

Restricting access using IP-based network security groups and private networks helps enhance security in Azure DevOps by limiting access to your resources based on specific IP addresses or address ranges. This approach can help prevent unauthorized access and reduce the attack surface of your environment.

8. Establishing secure communication with on-premises systems using VPN or ExpressRoute.

Establishing secure communication with on-premises systems using VPN or ExpressRoute is essential when you need to integrate Azure DevOps with your existing infrastructure. Both options allow you to create private connections between your on-premises network and Azure, ensuring secure data transfer and reducing exposure to the public internet

9. Protecting and routing network traffic with Azure DDoS Protection and Azure Firewall.

Protecting and routing network traffic with Azure DDoS Protection and Azure Firewall enhances the security of your Azure DevOps environment by safeguarding against Distributed Denial of Service (DDoS) attacks and filtering network traffic based on specific rules.

10. Applying code review processes and utilizing static and dynamic code analysis tools for vulnerability detection.

Applying code review processes to detect security vulnerabilities is essential for ensuring the security and reliability of your Azure DevOps projects. Code reviews help identify potential issues early in the development process, reducing the risk of security breaches and improving overall code quality

11. Establishing secure coding standards and ensuring dependency security.

Using static and dynamic code analysis tools for automatic detection of vulnerabilities is a crucial part of ensuring the security of your Azure DevOps projects. These tools can help identify potential issues early in the development process, reducing the risk of security breaches and improving overall code quality. Select suitable static application security testing (SAST) and dynamic application security testing (DAST) tools based on your organization's requirements, programming languages, and frameworks. Examples of SAST tools include SonarQube, Fortify, and Checkmarx, while examples of DAST tools include OWASP ZAP, Burp Suite, and Arachni.

12. Incorporating security controls and automated tests in Build and Release pipelines.

Adding security controls and automated tests in Build and Release pipelines can help improve the security of your Azure DevOps projects by identifying and addressing vulnerabilities early in the development process. Integrating security checks into your pipelines ensures that security is an integral part of your software development lifecycle.

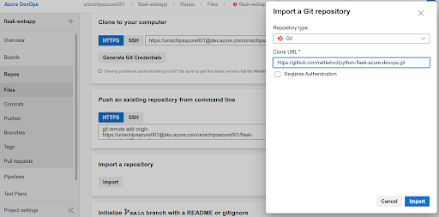
13. Securing agents with trusted agent pools and implementing Git branch policies and pull request reviews for code security.

Securing agents by using trusted agent pools is essential to ensure the integrity and security of your build and release processes in Azure DevOps. Trusted agent pools help minimize the risk of unauthorized access or tampering with your build and release pipelines

14. Storing credentials, certificates, and access keys securely in Azure Key Vault and configuring access for Azure DevOps pipelines.

Securely storing credentials, certificates, and access keys in Azure Key Vault is crucial for protecting sensitive information and maintaining the security of your Azure DevOps projects. Azure Key Vault helps centralize and manage secrets, making it easier to implement secure access controls and monitor usage

15. Monitoring changes using Azure DevOps audit logs for security, compliance, and operational awareness.

Monitoring changes using Azure DevOps audit logs is essential for maintaining security, compliance, and operational awareness in your DevOps environment. Audit logs provide visibility into activities and changes within your Azure DevOps projects, enabling you to track user behavior, identify potential security issues, and troubleshoot problems

16. Continuously tracking and improving security posture with Azure Policy and Azure Security Center

Continuously tracking and improving your security posture with Azure Policy and Azure Security Center is essential for ensuring the ongoing security and compliance of your Azure DevOps environment. These tools help you define, monitor, and enforce security policies across your Azure resources, providing a comprehensive view of your security posture and facilitating continuous improvement.

17. Conducting internal and external security audits and penetration tests for evaluation and continuous improvement.

Performing internal and external security audits and penetration tests is essential for evaluating the security of your Azure DevOps environment and identifying potential vulnerabilities. Regular audits and tests help you uncover security weaknesses, validate existing security controls, and prioritize remediation efforts

18. Regularly review and update the security configurations of your Azure DevOps services, resources, and tools.

Regularly reviewing and updating the security configurations of your Azure DevOps services, resources, and tools is an essential practice to maintain a secure environment and address evolving threats.

19. Implement secure baselines for your Azure resources and enforce them consistently across your environment.

Implementing secure baselines for your Azure resources and enforcing them consistently across your environment is crucial to maintaining a secure and compliant Azure DevOps setup

20. Use Azure Policy to define and enforce security configurations across your Azure resources.

Using Azure Policy to define and enforce security configurations across your Azure resources is a crucial part of maintaining a secure and compliant environment

21. Continuously monitor configuration changes and assess their impact on your security posture.

Continuously monitoring configuration changes and assessing their impact on your security posture is vital for maintaining a secure environment and addressing potential risks in a timely manner

22. Implement a robust backup and recovery strategy for your critical data, including source code, artifacts, and configuration data.

Implementing a robust backup and recovery strategy for your critical data, including sourcecode, artifacts, and configuration data, is essential for ensuring business continuity andreducing the impact of data loss or corruption. The main points to consider for this are identify critical data, define backup frequency and retention policies, choose appropriate backup methods, use of azure native backup solutions, store backups offsite/multiple locations, encrypt backups etc 

23. Use Azure Backup and Azure Site Recovery to protect your data and applications.

Using Azure Backup and Azure Site Recovery to protect your data and applications is an effective way to ensure business continuity and minimize downtime in the event of data loss or disasters.

24. Regularly test your data recovery processes to ensure they are effective and up to date.

Regularly testing your data recovery processes to ensure they are effective and up to date is crucial for maintaining business continuity and reducing the impact of data loss or corruption.  The main points to consider here is Develop a testing schedule, Test various recovery scenarios, Document test results, Update recovery plans, Train and educate your teams, Review and update testing processes.By regularly testing your data recovery processes, you can ensure they are effective and up to date, helping to maintain business continuity and minimize the impact of data loss or corruption. This proactive approach also supports a culture of continuous improvement and collaboration across teams and helps protect your organization's assets.

25. Establish a disaster recovery plan to minimize downtime and data loss in case of a security breach or system failure.

Establishing a disaster recovery plan is essential to minimize downtime and data loss in case of a security breach or system failure. Main points to be considered here is Identify critical systems and assets, Define recovery objectives, Develop recovery strategies, Document recovery procedures, Test and validate the plan, Train and educate your teams, Review and update the plan. By establishing a disaster recovery plan, you can minimize downtime and data loss in case of a security breach or system failure, helping to maintain business continuity and protect your organization's assets. This proactive approach also supports a culture of continuous improvement and collaboration across teams.

26. Maintain an up-to-date inventory of all Azure DevOps resources, including repositories, pipelines, environments, and tools.

Maintaining an up-to-date inventory of all Azure DevOps resources, including repositories, pipelines, environments, and tools, is crucial for managing and securing your organization's assets effectively. Main points to be considered here is Create a centralized inventory, Include relevant metadata, Implement a tagging strategy, Automate inventory updates,Regularly review and audit your inventory, Integrate with other asset management systems. By maintaining an up-to-date inventory of all Azure DevOps resources, you can better manage and secure your organization's assets, track changes, and enforce access control policies. This proactive approach helps protect your organization's assets and fosters a culture of continuous improvement and collaboration across teams.

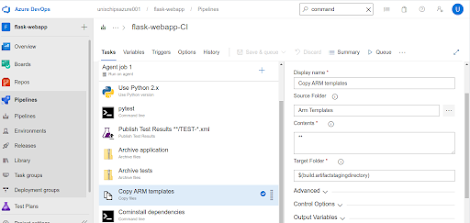
27. Use Azure Resource Manager (ARM) templates to manage your Azure resources in a consistent and automated manner.

Using Azure Resource Manager (ARM) templates to manage your Azure resources in a consistent and automated manner is an important best practice for managing infrastructure as code. Main points to be considered here are Standardize resource configurations, Improve collaboration and version control, Automate resource provisioning and updates, Simplify resource management, Validate and test templates, Reuse and share templates. By using Azure Resource Manager (ARM) templates to manage your Azure resources in a consistent and automated manner, you can improve collaboration, simplify resource management, and reduce the potential for human error and inconsistencies. This approach also supports a culture of continuous improvement and collaboration across teams, helping to protect your organization's assets and streamline operations

28. Implement tagging strategies to categorize your Azure resources based on project, team, or other relevant attributes.

Implementing tagging strategies to categorize your Azure resources based on project, team, or other relevant attributes is an essential practice for effective resource management and organization. Main points to be considered here is Define a consistent tagging strategy, Use meaningful and descriptive tags, Enforce tag usage, Monitor and audit tag usage, Update and maintain your tagging strategy, Use tags for cost management and reporting.By implementing tagging strategies to categorize your Azure resources based on project, team, or other relevant attributes, you can improve resource management, organization, and cost allocation. This approach also promotes a culture of collaboration and shared responsibility across teams, helping to protect your organization's assets and streamline operations.

29. Continuously monitor your inventory and resources for any unauthorized changes or access.

Continuously monitoring your inventory and resources for any unauthorized changes or access is crucial for maintaining the security and integrity of your Azure DevOps environment. The main points to be considered here are Use Azure Monitor, Review Azure DevOps audit logs, Implement Azure Security Center, Configure Azure Active Directory (AD) monitoring, Set up intrusion detection and prevention systems, Regularly audit access control and permissions. Use automated tools for monitoring. By continuously monitoring your inventory and resources for unauthorized changes or access, you can proactively detect potential security issues and respond quickly to mitigate risks. This approach helps maintain the security and integrity of your Azure DevOps environment and fosters a culture of shared responsibility and vigilance across your organization.


In conclusion, adopting a comprehensive security approach when using Azure DevOps is crucial for protecting your organization's assets and ensuring the integrity of your development and deployment processes. By following the guidelines outlined above, you can effectively manage access control, authentication, network security, code security, Azure Key Vault usage, and regular auditing to maintain a secure environment.


Monday, August 7, 2023

Vulnerability assessment in kubernetes using Kube bench


Kube-Bench is an open-source tool developed by Aqua Security that helps you check the security configuration of Kubernetes clusters. It automates the process of auditing a Kubernetes cluster against the Center for Internet Security (CIS) Kubernetes Benchmark. The CIS Kubernetes Benchmark is a set of best practices and security recommendations to secure Kubernetes deployments.

Kube-Bench is widely used by system administrators, security professionals, and anyone responsible for the security and compliance of Kubernetes environments. It assesses the security posture of a cluster by running a series of tests based on the CIS Kubernetes Benchmark and provides a detailed report highlighting any potential security misconfigurations or vulnerabilities.

Basic functionality of the kube bench is explaining below 


  • Scanning Kubernetes Cluster: Kube-Bench connects to the Kubernetes API server and performs a series of checks against the cluster's configuration and settings.


  • CIS Benchmark Tests: The tool runs a set of checks based on the CIS Kubernetes Benchmark. The benchmark consists of various security recommendations categorized into different sections, such as control plane configuration, node security, network policies, etc.


  • Generating Reports: After scanning the cluster, Kube-Bench generates a comprehensive report detailing the results of each check. The report indicates whether each security check has passed or failed, along with additional information and recommendations.


  • Remediation: Based on the report generated by Kube-Bench, administrators can take necessary actions to address any security issues and misconfigurations identified during the scan.

Let's install and configure kube bench in a sample kubernetes cluster 


Install Kube-Bench:

We can install Kube-Bench using various methods, such as downloading the binary from the GitHub releases page or using a package manager. Here's an example of installing it using curl and bash

#curl -L https://github.com/aquasecurity/kube-bench/releases/latest/download/kube-bench | sudo tee /usr/local/bin/kube-bench > /dev/null sudo 
#chmod +x /usr/local/bin/kube-bench

Run Kube-Bench against your Kubernetes cluster. You'll need the kubeconfig file to authenticate with the cluster. Replace path/to/your/kubeconfig.yaml with the actual path to your kubeconfig file: The default location of the kubeconfig file will be $Home/.kube/config

# kube-bench -c path/to/your/kubeconfig.yaml

Once this command it executed we will get the result as below 


********************************************************************************
[INFO] 1 Master Node Security Configuration
   [INFO] 1.1 API Server
     [PASS] 1.1.1 Ensure that the --allow-privileged argument is set to false (Scored)
     [PASS] 1.1.2 Ensure that the --anonymous-auth argument is set to false (Scored)
     [FAIL] 1.1.3 Ensure that the --basic-auth-file argument is not set (Scored)
     [PASS] 1.1.4 Ensure that the --insecure-allow-any-token argument is set to false (Scored)
     ...

   [INFO] 1.2 Controller Manager
     [PASS] 1.2.1 Ensure that the --terminated-pod-gc-threshold argument is set as appropriate (Scored)
     [PASS] 1.2.2 Ensure that the --profiling argument is set to false (Scored)
     ...

[INFO] 2 Node Security Configuration
   [INFO] 2.1 Kubelet
     [PASS] 2.1.1 Ensure that the --anonymous-auth argument is set to false (Scored)
     [PASS] 2.1.2 Ensure that the --authorization-mode argument is not set to AlwaysAllow (Scored)
     [PASS] 2.1.3 Ensure that the --protect-kernel-defaults argument is set to true (Scored)
     ...

   [INFO] 2.2 Docker
     [PASS] 2.2.1 Ensure that the version of Docker is up to date (Scored)
     [PASS] 2.2.2 Ensure that the Docker daemon is configured to drop Linux capabilities (Scored)
     ...

[INFO] 3 ETCD Security Configuration
   [PASS] 3.1 Ensure that the --cert-file and --key-file arguments are set as appropriate (Scored)
   [PASS] 3.2 Ensure that the --client-cert-auth argument is set to true (Scored)
   ...

[INFO] 4 Policies
   [INFO] 4.1 Pod Security Policies
     [PASS] 4.1.1 Ensure that a PodSecurityPolicy (PSP) is created (Scored)
     [PASS] 4.1.2 Ensure that the PSP controller is deployed (Scored)
     ...

   [INFO] 4.2 Network Policies
     [PASS] 4.2.1 Ensure that Calico network policy plugin is deployed (Scored)
     [PASS] 4.2.2 Ensure that 'NetworkPolicy' is set as the default network policy provider (Scored)
     ...

[INFO] 5 Logging and Monitoring
   [PASS] 5.1 Ensure that audit policies are configured (Scored)
   [PASS] 5.2 Ensure that the audit policy covers key security concerns (Scored)
   ...

==============================================================
|                     Summary Report                         |
==============================================================
|    Passing  |      74    |         |    Not Passing  |    4    |
==============================================================

****************************************************************************


In this sample report:

Each section (e.g., Master Node Security Configuration, Node Security Configuration, etc.) corresponds to a specific area of security checks.
Within each section, there are individual checks with their results (PASS, FAIL, WARN, etc.).
The summary at the end provides a count of passing and failing checks.

Remember that Kube-Bench is a tool for auditing and checking your cluster's security configuration. It doesn't fix any identified issues automatically. You will need to manually adjust your cluster's configuration based on the recommendations provided.

Sunday, July 30, 2023

Disaster Recovery ( DR ) Strategies in Kubernetes


Kubernetes is one of the powerful container management orchestration technology which is developed by Google (GKE). But Kubernetes itself does not provide any built in DR strategies , so let us check the best practices followed in industry as a part of DR.


1. Multi-Cluster Deployment: Deploying your applications across multiple Kubernetes clusters in different geographical regions or data centers can ensure higher availability in case of a disaster in one location. 

2. Backup and Restore: Regularly backing up your Kubernetes resources (e.g., manifests, configurations, secrets) and application data can aid in restoring the cluster to a previous state in the event of data loss or cluster failure.

3. Replication and High Availability: Use Kubernetes features like replicas and Deployments to ensure that critical applications have multiple instances running across different nodes to tolerate node or pod failures.

4. Namespace Isolation: Isolate applications with different levels of criticality into separate namespaces, allowing you to manage disaster recovery for each namespace independently.

5. Etcd Data Backup: Etcd is the distributed key-value store used by Kubernetes to store cluster state. Regularly backing up the Etcd data is crucial for disaster recovery, as restoring Etcd can bring your cluster back to a functional state.

6. Disaster Recovery Testing: Regularly test your disaster recovery procedures to ensure they work as expected and to identify any potential issues before a real disaster occurs.

7. Provider-Specific Tools: Some cloud providers offer their disaster recovery solutions tailored for Kubernetes deployments. These tools might provide automated backup and recovery processes.

8. Stateful Application Replication: For stateful applications, consider using mechanisms like database replication or distributed storage systems to ensure data availability across multiple nodes.

9. Disaster Recovery Policies: Establish clear policies and procedures for handling disaster recovery scenarios, including communication plans, roles and responsibilities, and escalation processes.

10. External Monitoring and Health Checks: Implement monitoring and health checks for your Kubernetes clusters and applications to quickly detect issues and initiate recovery processes.


Now let us check some of the external  tools using for kubernetes DR 

Kubernetes DR Tools 

Velero : Velero is an open-source tool that facilitates backup and restore operations for Kubernetes clusters and their resources. Formerly known as Heptio Ark, Velero was initially developed by Heptio (now part of VMware) to address the need for a robust and efficient backup solution for Kubernetes. The project was later donated to the Cloud Native Computing Foundation (CNCF) and has since gained popularity and community support.

Velero helps Kubernetes users to perform reliable backups of cluster resources, including persistent volumes, namespaces, configurations, and other critical objects. With Velero, you can create backups of your entire cluster or specific resources and restore them in case of data loss, cluster failure, or other disaster scenarios.

Restic : Restic is designed to efficiently and securely back up data to various types of storage targets, such as local disk, network-attached storage (NAS), cloud storage services like Amazon S3, Google Cloud Storage, or any other SFTP (SSH File Transfer Protocol) server that supports the SFTP or REST protocol.

While Restic itself is not tightly integrated with Kubernetes like Velero (formerly Heptio Ark), it can be used in conjunction with Kubernetes to back up and restore the data of your applications running on the cluster. Many Kubernetes users opt to use Restic for backing up the data inside the Kubernetes persistent volumes, which store the application data that needs to be retained beyond the lifespan of individual pods.

Kube-bench : Kube-Bench is an open-source tool developed by Aqua Security that helps you check the security configuration of Kubernetes clusters. It automates the process of auditing a Kubernetes cluster against the Center for Internet Security (CIS) Kubernetes Benchmark. The CIS Kubernetes Benchmark is a set of best practices and security recommendations to secure Kubernetes deployments. Also this tool will help to configure DR strategies in kubernetes 

Conclusion :


During a DR test, the Kubernetes cluster is subjected to a simulated disaster or failure, and the recovery processes are tested to ensure that they are functioning correctly. This allows the cluster administrators to identify any weaknesses or issues in the recovery process, and to address them before a real disaster occurs.

It's essential to carefully plan and design your Kubernetes environment with disaster recovery in mind from the start. The actual strategies and tools you choose will depend on your specific requirements, budget, and infrastructure. Always keep in mind that disaster recovery is an ongoing process that requires regular reviews, testing, and adjustments as your applications and infrastructure evolve.


Tuesday, July 18, 2023

Security Contexts in Kubernetes

 In Kubernetes, a security context is a feature that allows you to set various security-related settings at the pod or container level. These settings define the operating system-level permissions and constraints for the containers running within a pod. Security contexts help enforce security policies and isolation within the cluster. Here are some common security settings you can configure using security contexts:


1. Run as a non-root user: By default, containers run as the root user inside the container. However, it's considered a security best practice to run containers as non-root users to limit the potential impact of any security vulnerabilities. You can specify a non-root user using the runAsUser field.

2. Run as a specific group: In addition to specifying a non-root user, you can also specify a specific group for the container to run as using the runAsGroup field.

3. File permissions: You can control the file permissions for files and directories created within the container using the fsGroup field. This ensures that any files created by the container have the correct ownership and permissions.

4. Linux capabilities: Linux capabilities are a way to grant certain privileged operations to a process running inside a container without running the entire container as a privileged user. You can specify the Linux capabilities required by a container using the capabilities field.

5, Read-only file system: To enhance security, you can specify that the container's file system should be mounted as read-only. This prevents any modifications to the file system within the container. You can set the readOnlyRootFilesystem field to true to enforce a read-only file system.

6. Seccomp profiles: Seccomp (Secure Computing Mode) is a mechanism in the Linux kernel that allows you to restrict the system calls available to a process. You can specify a seccomp profile to further limit the system calls available to containers using the seccompProfile field.

To configure security contexts in Kubernetes, you can define them in the pod or container specification. Here's an example of how to configure security contexts in a pod:

****************************************************************************

apiVersion: v1

kind: Pod

metadata:

  name: my-pod

spec:

  containers:

  - name: my-container

    image: my-image

    securityContext:

      runAsUser: 1000

      fsGroup: 2000

      capabilities:

        add: ["NET_ADMIN"]

      readOnlyRootFilesystem: true

********************************************************************************

In this example, the my-container container will run as the user with UID 1000, any files created will have the group ID 2000, the NET_ADMIN capability will be added to the container, and the container's file system will be mounted as read-only.


Tuesday, August 3, 2021

Creating the azure pipeline and configuring python application in azure webapp

 What is an azure pipeline 

Azure pipeline automatically builds, tests the codes and makes them available to others. In a conventional SDLC environment we have to manually test the code in different environment before getting it to the production. But in azure pipe line everything will be done automatically with the pipe line . Azure pipe line has two parts  CI ( Continues Integration ) and CD ( continues deployment) . 

Continues Integration is the practice used by the development teams to merge and test the code. This will help us to fix the bugs in the early stage and move on .Continuous Delivery (CD) is a process by which code is built, tested, and deployed to one or more test and production environments.CI systems produce the deployable artifacts including infrastructure and apps. Automated release processes consume these artifacts to release new versions and fixes to existing systems. Monitoring and alerting systems run continually to drive visibility into the entire CD process

Next thing is the version control systems. The starting to configure the CI CD pipe line is pushing the source code the version control systems like GIT, Bit bucket etc. Each changes in the code will be committed as different versions in the version control system and pushed to the pipe line for CI CD process.

Languages : Azure pipe line can accommodate most of the languages like java, .net, python, nodeJS, C++, Go etc. 

Deployment Targets: We can deploy the code in many components using azure pipeline like VM's, containers, on permises and cloud platforms.Once you have continuous integration in place, the next step is to create a release definition to automate the deployment of your application to one or more environments

Continues Testing: Continues testing in the devops server help us to maintain the quality of the code after each changes we are performing in the code. Rich and actionable reporting felicities which is included in the pipeline help us identify the errors and solve it before committing the changes  . Also we can use package formats like NuGet, npm, or Maven packages to the built-in package management repository in Azure Pipelines.

The basic things which we needed for azure pipeline is 


  • An organization in Azure DevOps.
  • To have your source code stored in a version control system.


The basic architecture of the azure devops pipeline is given below 


Now Let's create the first pipe line . We are choosing python language as the code for this pipe line 

1. Login to the GIT  and fork the below repository in your account ( you can see the for button at top right corner of the GIT

https://github.com/rathishvd/python-flask-azure-devops


2. Next step is to create the azure devops organisation as below and create the project . We have created a project called "flask-webapp"


3. Once we will click the create pipeline option it will ask the repository details and once we login with the GIT credentials we have to choose the correct repository 


4. Now let us import the repository as below from the GIT HUB 


5. Let us import the repository as blow 


Once the code is imported we have below file layout available in azure repo 


6. Next let us create a new pipe line as below , select pipeline- new pipeline and classic view 


7. Add a new agent job and select python version as below 


8. Next step is add command line tools and install the dependencies 


9. Execute the tests as below ..

Add Command line task as above

  • Enter below details
  • Display name: Pytest
  • Script: pip install pytest && pytest Tests/unit_tests –junitxml=../TestResults/test-results.xml && pip install pycmd && py.cleanup Tests/


10.  Next step is publich the test results by adding the same 


11. Add archive file task to add the application 


  • Display name: Archive application
  • Root folder or file to archive: $(System.DefaultWorkingDirectory)/Application
  • Archive file to create: $(Build.ArtifactStagingDirectory)/Application$(Build.BuildId).zip


12 . Add another archive files tasks as below and fill the details as below 


  • Display name: Archive tests
  • Root folder or file to archive: $(System.DefaultWorkingDirectory)/Tests
  • Archive file to create: $(Build.ArtifactStagingDirectory)/Tests$(Build.BuildId).zip


13. Next step is copy ARM templates 

  • Display name: Copy ARM templates
  • Source Folder: ArmTemplates
  • Target Folder: $(build.artifactstagingdirectory)


14. Add publish artifacts as below 


15 . Now we have to save and run  the CI build as below ...


16. Next step is configuring the continues intergration  ( CI ) part 


Login to Azure portal and and create a resource group first called " flask-webapp-rg"


17. Select an Empty Job and crate a release pipe line 


18. Give the stage name as Dev ..


19. Next step is to provision azure webapps as below ..


Go back to release defenition and refresh the subescription 


Add the below details on the task and install the python extension ..

  • Location: South Central US
  • Template: $(System.DefaultWorkingDirectory)/**/windows-webapp-template.json
  • Override template parameters: -webAppName python-flask-mur -hostingPlanName python-flask-mur-plan -appInsightsLocation “South Central US” -sku “S1 Standard” (NOTE – REPLACE PYTHON-FLASK-MUR with your UNIQUE APP NAME)


Install azure python extension in azure app service manager task 


Deploy the application in webapp with below datails..

  • Connection type: Azure Resource Manager
  • Azure Subscription: python-flask-devops
  • App Service type: Web App on Windows
  • App Service name: python-flask-mur ENTER YOUR UNIQUE APP NAME CONFIGURED IN PREVIOUS STEP
  • Package or folder: $(System.DefaultWorkingDirectory)\**\Application*.zip


Post deployment session need to be configured as below 

  • Deployment script type: Inline Script
  • Inline Script: @echo off
    echo Installing dependencies
    call “D:\home\python353x86/python.exe” -m pip install -U setuptools
    if %errorlevel% NEQ 0 (
    echo Failed to install setuptools >&2
    EXIT /b 1
    )


Under output variables session add the below details 


Publish the test results 


Save the changes and create the release 


Run the release 


Now deployment is scucceded and login to azure portal and check the application  with webapp link 


We have succesfully created the python with azure webapp using azure pipe line ..


Thank you for reading .. 


Tuesday, July 27, 2021

configuring azure update manager for azure VM patching

 Patching the VM's in azure is one of the most important task in cloud operations to treat vulnerability fixes. We have a service called "update manager" is available for the same in azure portal. An effective software update management process is necessary to maintain operational efficiency, overcome security issues, and reduce the risks of increased cyber security threats. However, because of the changing nature of technology and the continual appearance of new security threats, effective  update management requires consistent and continual attention.

The basic architecture of azure update management is given below. The solution can be used to push updates for on premises and azure VM's 


Let's configure update management in azure portal step by step and test the patching in a linux VM.

  • The following steps highlight the actual implementation
  • Create an Automation account.
  • Add the Log analytics account with automation account 
  • Link the Automation account with the Log Analytics workspace.
  • Enable Update Management for Azure VMs.
  • Add the VM's to the update manager 
  • Patch the VM's using update manager 

Login to the azure portal and select the "automation account" from the search bar . Create the "automation account" as below . Create azure run as account is optional as it is used to manage azure resources from azure runbooks . I am keeping this as default "yes" . Please keep it in mind that name of the "Automation account" should be unique 


We have succesfully created the Automation account called "unixchipsac" in the same resource group which log analytics workspace contains 


Next step is to add the  Log analytics workspace with the automation account . Select the Automation account which we created and go to update management , we may need a separate log analytics account for the update manager which can be created along with the update manager configuration .


So configured "update management" profile will be as below


Next step is to create a virtual machine in linux as below , i have created a virtual machine in linux named as  "unixchips1" and same is available in update manager portal when we click add VM option 


Now we have to patch the VM using update manager . If you click on the "missing update" tab you can see the missing updates for the particular VM.


We have to schedule the patching by providing details like deployment name, VM name, groupname ( this option is useful where we can add the machines to different groups and patch together) , pre or post scripts for patching 


So we have successfully scheduled the patching window as below 


After the patching if we click the jobs we can see the patching is completed successfully


If we check the Job statistics , we can see the report as below . So we have successfully patched the VM using azure update management 


Thank you for Reading this blog and feel free to post your feedback and comments