Monday, June 11, 2018

Amazon VPC and its sample configuration

A virtual private cloud (VPC) is a virtual network which is similar to our traditional data center, but VPC supports the scalable  infrastructure resources of AWS. Amazone VPC allows you to use launch Amazone web services resources to a virtual network that you have defined . Also this will help you to created isolated networks for your applications or clients

The main components of the Amazon VPC is provided below

VPC: A virtual private cloud (VPC) is a virtual network dedicated to your AWS account. It is logically isolated from other virtual networks in the AWS cloud. You can launch your AWS resources, such as Amazon EC2 instances, into your VPC. You can configure your VPC; you can select its IP address range, create subnets, and configure route tables, network gateways, and security settings.

Subnet: A subnet is a range of IP addresses in your VPC. You can launch AWS resources into a subnet that you select. Use a public subnet for resources that must be connected to the Internet, and a private subnet for resources that won't be connected to the Internet.

Route Table: A route table contains a set of rules, called routes, that are used to determine where network traffic is directed.
Each subnet in your VPC must be associated with a route table; the table controls the routing for the subnet. A subnet can only be associated with one route table at a time, but you can associate multiple subnets with the same route table.

Internet Gateway: An Internet gateway is a horizontally scaled, redundant, and highly available VPC component that allows communication between instances in your VPC and the Internet. It therefore imposes no availability risks or bandwidth constraints on your network traffic.

Network ACLs: A network access control list (ACL) is an optional layer of security for your VPC that acts as a firewall for controlling traffic in and out of one or more subnets. You might set up network ACLs with rules similar to your security groups in order to add an additional layer of security to your VPC.


Different VPC scenarios

Scenario  Usage 
Scenario 1: VPC with a Single Public Subnet Your instances run in a private, isolated section of the AWS cloud with direct access to the Internet
Scenario 2: VPC with Public and Private Subnets (NAT) In addition to containing a public subnet, this configuration adds a private subnet whose instances are not addressable from the Internet. Instances in the private subnet can establish outbound connections to the Internet via the public subnet using Network Address Translation (NAT).
Scenario 3: VPC with Public and Private Subnets and Hardware VPN Access This configuration adds an IPsec Virtual Private Network (VPN) connection between your Amazon VPC and your data center - effectively extending your data center to the cloud while also providing direct access to the Internet for public subnet instances in your Amazon VPC.
Scenario 4: VPC with a Private Subnet Only and Hardware VPN Access Your instances run in a private, isolated section of the AWS cloud with a private subnet whose instances are not addressable from the Internet. You can connect this private subnet to your corporate data center via an IPsec Virtual Private Network (VPN) tunnel.


Steps for creating the VPC setup

1. Login to the AWS console and go to networking session and click on the VPC ( you can go to the EC2 session also and can see the VPC below that in left side bar as below), click on the create VPC and provide the VPC name (unixchipsVP) and IPV4 CIDR block range also (10.3.0.0/16)


2.  Once you create the VPC if you check the relative components of these you can see one route table is created along with a network ACL, and a security group also


3. Let's create the public subnet with an understandable naming convention as 10.3.0.0-ap-aouth-1a_public, select the VPC as unixchipsVP and associate the CIDR range as 10.3.0.0/16 (sample configuration is below)


4. Create the private subnet as below , name should be 10.3.2.0-ap-south-1b-private and the CIDR range will be 10.3.2.0/24


5. Now we have to create the internet gateway and attach the same to VPC as below


6. Configure the route table to provide the access to the internet gateway


7. Select the subnet assosiations from the down tab and associate the public subnet with that


8. Now in the public subnet we need a public ip to be auto assigned
Go to subnet – select the public subnet- subnet actions- modify autoassign ip settings


9. Create the instances in public and private subnet ( make sure you are using seperate security groups for both )

Instance settings are given below

Settings for Public


Settings for private


Also make sure you are configuring the inbound rules of the private instance security group as as custom and the network range should be 10.3.0.0/16


10 . Now connect to the public instance and from there try to access the private instance and you should be able to access as below

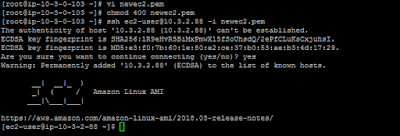


To ssh to the private instance , copy the .pem file attached to your public webserver and provide the ownership as 400 and connect as below


Ok now you have created the VPC and logged in to the attached instances , now we have to attach a NAT instance with that and that i will explain in other session .

Thanks for sharing the feed back

Wednesday, December 6, 2017

ksplice configuration in OEL ( Oracle Enterprise Linux) for uninterrupted updates

Ksplice is a tool from oracle which will help you to configure patches without downtime.This tool is very much usefull where SLA needs to be maintained with less downtime. But one important thing major kernel changes cannot be performed using ksplice and it will pushes the patches to the current active kernels.

First we need to register the server to oracle ULN network ( Unbreakable Linux) 

  •  Type the command "up2date --register" as root and it will prompt you to enter your ULN credentials which is received from oracle in below screen.including the CSI number 


  •  Select "next" option 1 by 1 in below screens 


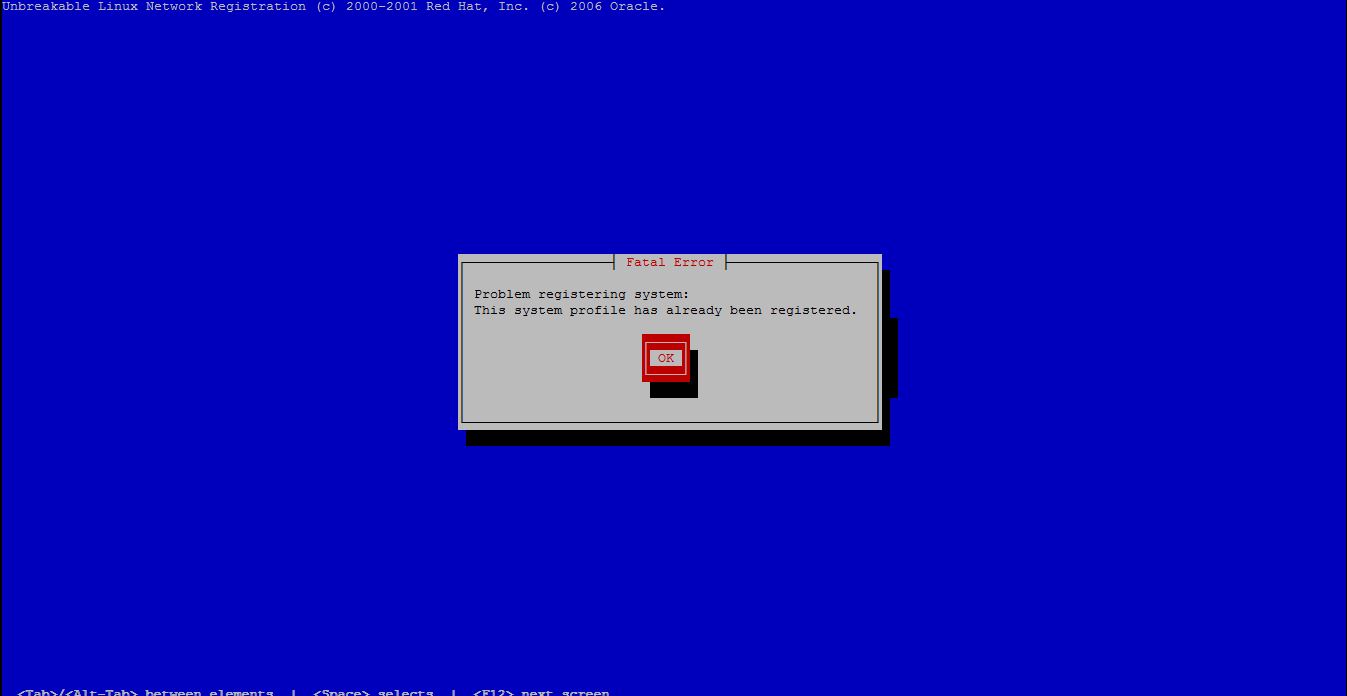
  • Some time you will get the popup as system is already registered if it is not registered already, we have a work around for this issue which i will show you below 


type the below command as root and copy the uuid of the system 

[root@unixchips01 ~]#  /usr/bin/uuidgen -r
1ba9f165-9357-451e-ad48-b19d500bf5d1

edit the etc/sysconfig/rhn/up2date-uuid and update the copied uuid as below format (comment the old uuid)

[root@unixchips01 ~]# vi /etc/sysconfig/rhn/up2date-uuid
#rhnuuid=91d0junk-1538-11db-8f59-123bdba2bb0f
rhnuuid=1ba9f165-9357-451e-ad48-b19d500bf5d1

Now run the "up2date --register" command again and it will allow you to register the system in ULN network 


  • Now we need to download the ksplice and install it 

*********************************************************************************
[root@unixchips01 ~]# wget -N https://www.ksplice.com/uptrack/install-uptrack
--2017-12-06 15:35:49--  https://www.ksplice.com/uptrack/install-uptrack
Resolving www.ksplice.com... 137.254.56.32
Connecting to www.ksplice.com|137.254.56.32|:443... connected.
HTTP request sent, awaiting response... 200 OK
Length: 10218 (10.0K) [text/plain]
Saving to: `install-uptrack'

100%[==============================================================================================================================>] 10,218      --.-K/s   in 0.09s

2017-12-06 15:35:50 (113 KB/s) - `install-uptrack' saved [10218/10218]
*********************************************************************************
  • Once you download the script called install-uptrack provide the executable permission and install using below command  (where the id is the ksplice id which is received while purchasing the support) 
[root@unixchips01 ~]# sh install-uptrack 82d8fa9a78789cb865948f246723250a924052b64e7b8364e63991576747dd27
[ Release detected: ol ]
--2017-12-06 15:36:09--  https://www.ksplice.com/yum/uptrack/ol/ksplice-uptrack-release.noarch.rpm
Resolving www.ksplice.com... 137.254.56.32
Connecting to www.ksplice.com|137.254.56.32|:443... connected.
HTTP request sent, awaiting response... 200 OK
Length: 6876 (6.7K) [application/x-rpm]
Saving to: `ksplice-uptrack-release.noarch.rpm'

100%[==============================================================================================================================>] 6,876       --.-K/s   in 0.09s

2017-12-06 15:36:09 (76.4 KB/s) - `ksplice-uptrack-release.noarch.rpm' saved [6876/6876]

[ Installing Uptrack ]
warning: ksplice-uptrack-release.noarch.rpm: Header V3 DSA signature: NOKEY, key ID 16c083cd
Preparing packages for installation...
ksplice-uptrack-release-1-3
Loaded plugins: rhnplugin, security
This system is receiving updates from ULN.
ksplice-uptrack                                                                                                                                  |  951 B     00:00
ksplice-uptrack/primary                                                                                                                          | 8.6 kB     00:00
ksplice-uptrack                                                                                                                                                   44/44
ol5_x86_64_UEK_latest                                                                                                                            | 1.2 kB     00:00
ol5_x86_64_UEK_latest/primary                                                                                                                    |  32 MB     00:33
ol5_x86_64_UEK_latest                                                                                                                                           686/686
ol5_x86_64_ksplice                                                                                                                               | 1.2 kB     00:00
ol5_x86_64_ksplice/primary                                                                                                                       | 354 kB     00:00
ol5_x86_64_ksplice                                                                                                                                            3543/3543
ol5_x86_64_latest                                                                                                                                | 1.4 kB     00:00
ol5_x86_64_latest/primary                                                                                                                        |  29 MB     00:31
ol5_x86_64_latest: [############################################                                                                                           ] 5181/15734

ol5_x86_64_latest                                                                                                                                           15734/15734
Setting up Install Process
Resolving Dependencies
--> Running transaction check
---> Package uptrack.noarch 0:1.2.47-0.el5 set to be updated
--> Processing Dependency: uptrack-python-pycurl for package: uptrack
--> Processing Dependency: uptrack-PyYAML for package: uptrack
--> Running transaction check
---> Package uptrack-PyYAML.x86_64 0:3.08-4.el5 set to be updated
--> Processing Dependency: uptrack-libyaml >= 0.1.3-1 for package: uptrack-PyYAML
---> Package uptrack-python-pycurl.x86_64 0:7.15.5.1-4.el5 set to be updated
--> Running transaction check
---> Package uptrack-libyaml.x86_64 0:0.1.4-1.el5 set to be updated
--> Finished Dependency Resolution

Dependencies Resolved

========================================================================================================================================================================
 Package                                       Arch                           Version                                  Repository                                  Size
========================================================================================================================================================================
Installing:
 uptrack                                       noarch                         1.2.47-0.el5                             ksplice-uptrack                            667 k
Installing for dependencies:
 uptrack-PyYAML                                x86_64                         3.08-4.el5                               ol5_x86_64_ksplice                         164 k
 uptrack-libyaml                               x86_64                         0.1.4-1.el5                              ksplice-uptrack                             52 k
 uptrack-python-pycurl                         x86_64                         7.15.5.1-4.el5                           ol5_x86_64_ksplice                          31 k

Transaction Summary
========================================================================================================================================================================
Install       4 Package(s)
Upgrade       0 Package(s)

Total download size: 914 k
Downloading Packages:
(1/4): uptrack-python-pycurl-7.15.5.1-4.el5.x86_64.rpm                                                                                           |  31 kB     00:00
(2/4): uptrack-libyaml-0.1.4-1.el5.x86_64.rpm                                                                                                    |  52 kB     00:00
(3/4): uptrack-PyYAML-3.08-4.el5.x86_64.rpm                                                                                                      | 164 kB     00:00
(4/4): uptrack-1.2.47-0.el5.noarch.rpm                                                                                                           | 667 kB     00:01
------------------------------------------------------------------------------------------------------------------------------------------------------------------------
Total                                                                                                                                   308 kB/s | 914 kB     00:02
Running rpm_check_debug
Running Transaction Test
Finished Transaction Test
Transaction Test Succeeded
Running Transaction
  Installing     : uptrack-python-pycurl                                                                                                                            1/4
  Installing     : uptrack-libyaml                                                                                                                                  2/4
  Installing     : uptrack-PyYAML                                                                                                                                   3/4
  Installing     : uptrack                                                                                                                                          4/4
There are no existing modules on disk that need basename migration.

Installed:
  uptrack.noarch 0:1.2.47-0.el5

Dependency Installed:
  uptrack-PyYAML.x86_64 0:3.08-4.el5                 uptrack-libyaml.x86_64 0:0.1.4-1.el5                 uptrack-python-pycurl.x86_64 0:7.15.5.1-4.el5

Complete!

  • Also you can see the updates pending for installation as below 
Effective kernel version is 2.6.39-400.297.3.el5uek
The following steps will be taken:
Install [suh79ofj] Correctly clear garbage data on the kernel stack when handling signals.
Install [1sh67r01] CVE-2017-1000364: Increase stack guard size to 1 MiB.
Install [am4utewl] CVE-2015-2686: Privilege escalation in sendto() and recvfrom() syscalls.
Install [6ex4rf8z] CVE-2015-4167: Memory corruption when mounting malformed UDF disk images.
Install [bid2es5g] CVE-2017-7273: Denial-of-service in Crypress USB HID driver.
Install [houxosz2] CVE-2015-1465: Denial of service in IPv4 packet forwarding.
Install [iwxmcukh] CVE-2014-9710: Privilege escalation in Btrfs when replacing extended attributes.
Install [5kb8dcqi] CVE-2017-9242: Denial-of-service when using send syscall of IPV6 socket.
Install [h6osusrl] CVE-2016-9604: Permission bypass when creating key using keyring subsystem.
Install [bb8dm7ft] CVE-2016-9685: Memory leak in XFS filesystem operations.
Install [dsja5i0v] CVE-2016-10200: Denial-of-service when creating L2TP sockets using concurrent thread.
Install [f4bfciaj] CVE-2017-1000365: Privilege escalation when performing exec.
Install [t7upxzml] CVE-2017-12134, XSA-229: Privilege escalation in Xen block IO requests.
Install [j9s7zjzf] CVE-2017-1000251: Stack overflow in Bluetooth L2CAP config buffer.
Install [4h95f4sm] CVE-2017-1000253: Privilege escalation via stack overflow in PIE binaries.
Install [n5hdfyhm] CVE-2017-1000111: Privilege escalation when setting options on AF_PACKET socket.
Install [c8t1eenj] CVE-2017-7542: Buffer overflow when parsing IPV6 fragments header.
Install [4p5x4q18] CVE-2017-11176: Use-after-free in message queue notify syscall.
Install [7ycabyox] CVE-2017-14489: NULL pointer dereference in the SCSI transport layer.
Install [fpz4et19] CVE-2017-10661: Data race when canceling timer file descriptors causes denial-of-service.
Install [5qajgmai] CVE-2017-9075: Denial-of-service in SCTPv6 sockets.
Install [gczn7k1y] CVE-2017-9077: Denial-of-service in TCPv6 sockets.
Install [qvq8bn89] CVE-2017-9074: Information leak via ipv6 fragment header.
Install [ew4sffpv] CVE-2017-1000380: Information leak when reading timer information from ALSA devices.
Install [36v62nbc] CVE-2017-7308: Memory corruption in AF_PACKET socket options.
Install [56lrpsgc] CVE-2016-10044: Permission bypass when setting up an async io filesystem.
Install [7plhqvh9] CVE-2017-9074: Denial-of-service when using Generic Segmentation Offload on IPV6 socket.
Install [clznw6t3] CVE-2017-8831: Denial-of-service when using NXP SAA7164 video driver.


  • We can install the updates of the current kernel using the command "uptrack-upgrade -y"
[root@unixchips01 ~]# uptrack-upgrade -y
The following steps will be taken:
Install [suh79ofj] Correctly clear garbage data on the kernel stack when handling signals.
Install [1sh67r01] CVE-2017-1000364: Increase stack guard size to 1 MiB.
Install [am4utewl] CVE-2015-2686: Privilege escalation in sendto() and recvfrom() syscalls.
Install [6ex4rf8z] CVE-2015-4167: Memory corruption when mounting malformed UDF disk images.
Install [bid2es5g] CVE-2017-7273: Denial-of-service in Crypress USB HID driver.
Install [houxosz2] CVE-2015-1465: Denial of service in IPv4 packet forwarding.
Install [iwxmcukh] CVE-2014-9710: Privilege escalation in Btrfs when replacing extended attributes.
Install [5kb8dcqi] CVE-2017-9242: Denial-of-service when using send syscall of IPV6 socket.
Install [h6osusrl] CVE-2016-9604: Permission bypass when creating key using keyring subsystem.
Install [bb8dm7ft] CVE-2016-9685: Memory leak in XFS filesystem operations.
Install [dsja5i0v] CVE-2016-10200: Denial-of-service when creating L2TP sockets using concurrent thread.
Install [f4bfciaj] CVE-2017-1000365: Privilege escalation when performing exec.
Install [t7upxzml] CVE-2017-12134, XSA-229: Privilege escalation in Xen block IO requests.
Install [j9s7zjzf] CVE-2017-1000251: Stack overflow in Bluetooth L2CAP config buffer.
Install [4h95f4sm] CVE-2017-1000253: Privilege escalation via stack overflow in PIE binaries.
Install [n5hdfyhm] CVE-2017-1000111: Privilege escalation when setting options on AF_PACKET socket.
Install [c8t1eenj] CVE-2017-7542: Buffer overflow when parsing IPV6 fragments header.
Install [4p5x4q18] CVE-2017-11176: Use-after-free in message queue notify syscall.
Install [7ycabyox] CVE-2017-14489: NULL pointer dereference in the SCSI transport layer.
Install [fpz4et19] CVE-2017-10661: Data race when canceling timer file descriptors causes denial-of-service.
Install [5qajgmai] CVE-2017-9075: Denial-of-service in SCTPv6 sockets.
Install [gczn7k1y] CVE-2017-9077: Denial-of-service in TCPv6 sockets.
Install [qvq8bn89] CVE-2017-9074: Information leak via ipv6 fragment header.
Install [ew4sffpv] CVE-2017-1000380: Information leak when reading timer information from ALSA devices.
Install [36v62nbc] CVE-2017-7308: Memory corruption in AF_PACKET socket options.
Install [56lrpsgc] CVE-2016-10044: Permission bypass when setting up an async io filesystem.
Install [7plhqvh9] CVE-2017-9074: Denial-of-service when using Generic Segmentation Offload on IPV6 socket.
Install [clznw6t3] CVE-2017-8831: Denial-of-service when using NXP SAA7164 video driver.
Installing [suh79ofj] Correctly clear garbage data on the kernel stack when handling signals.
Installing [1sh67r01] CVE-2017-1000364: Increase stack guard size to 1 MiB.
Installing [am4utewl] CVE-2015-2686: Privilege escalation in sendto() and recvfrom() syscalls.
Installing [6ex4rf8z] CVE-2015-4167: Memory corruption when mounting malformed UDF disk images.
Installing [bid2es5g] CVE-2017-7273: Denial-of-service in Crypress USB HID driver.
Installing [houxosz2] CVE-2015-1465: Denial of service in IPv4 packet forwarding.
Installing [iwxmcukh] CVE-2014-9710: Privilege escalation in Btrfs when replacing extended attributes.
Installing [5kb8dcqi] CVE-2017-9242: Denial-of-service when using send syscall of IPV6 socket.
Installing [h6osusrl] CVE-2016-9604: Permission bypass when creating key using keyring subsystem.
Installing [bb8dm7ft] CVE-2016-9685: Memory leak in XFS filesystem operations.
Installing [dsja5i0v] CVE-2016-10200: Denial-of-service when creating L2TP sockets using concurrent thread.
Installing [f4bfciaj] CVE-2017-1000365: Privilege escalation when performing exec.
Installing [t7upxzml] CVE-2017-12134, XSA-229: Privilege escalation in Xen block IO requests.
Installing [j9s7zjzf] CVE-2017-1000251: Stack overflow in Bluetooth L2CAP config buffer.
Installing [4h95f4sm] CVE-2017-1000253: Privilege escalation via stack overflow in PIE binaries.
Installing [n5hdfyhm] CVE-2017-1000111: Privilege escalation when setting options on AF_PACKET socket.
Installing [c8t1eenj] CVE-2017-7542: Buffer overflow when parsing IPV6 fragments header.
Installing [4p5x4q18] CVE-2017-11176: Use-after-free in message queue notify syscall.
Installing [7ycabyox] CVE-2017-14489: NULL pointer dereference in the SCSI transport layer.
Installing [fpz4et19] CVE-2017-10661: Data race when canceling timer file descriptors causes denial-of-service.
Installing [5qajgmai] CVE-2017-9075: Denial-of-service in SCTPv6 sockets.
Installing [gczn7k1y] CVE-2017-9077: Denial-of-service in TCPv6 sockets.
Installing [qvq8bn89] CVE-2017-9074: Information leak via ipv6 fragment header.
Installing [ew4sffpv] CVE-2017-1000380: Information leak when reading timer information from ALSA devices.
Installing [36v62nbc] CVE-2017-7308: Memory corruption in AF_PACKET socket options.
Installing [56lrpsgc] CVE-2016-10044: Permission bypass when setting up an async io filesystem.
Installing [7plhqvh9] CVE-2017-9074: Denial-of-service when using Generic Segmentation Offload on IPV6 socket.
Installing [clznw6t3] CVE-2017-8831: Denial-of-service when using NXP SAA7164 video driver.
Your kernel is fully up to date.


Now your system is fully updated with current kernel and we can check the changes in the current kernel version also


  • We can check the system status using the below weblink with your oracle support credentials 

https://status-ksplice.oracle.com/status/


Thursday, November 16, 2017

Configuring block storage ( cinder ) in storage part


As we don't have a separate storage node in our openstack lab setup , i forced to use the controller node as the storage .
  • First make sure we have a row partition available in the node 

root@CTRL:~# fdisk -l /dev/sdc

Disk /dev/sdb: 10.7 GB, 10737418240 bytes
255 heads, 63 sectors/track, 1305 cylinders, total 20971520 sectors
Units = sectors of 1 * 512 = 512 bytes
Sector size (logical/physical): 512 bytes / 512 bytes
I/O size (minimum/optimal): 512 bytes / 512 bytes
Disk identifier: 0x00000000

Disk /dev/sdb doesn't contain a valid partition table 

  •  Create a physical volume in the disk

root@CTRL:~# pvcreate /dev/sdc
  Physical volume "/dev/sdc" successfully created
root@CTRL:~#
  • create a new volume group using /dev/sdc and this will be used as the cinder volume
root@CTRL:~# vgcreate cinder-volumes /dev/sdc
  Volume group "cinder-volumes" successfully created
root@CTRL:~# vgs cinder-volumes
  VG             #PV #LV #SN Attr   VSize  VFree
  cinder-volumes   1   0   0 wz--n- 10.00g 10.00g
root@CTRL:~#


  • Reconfigure the lvm to use only the cinder volume /dev/sdc , so we may need to apply filters there . edit the /etc/lvm/lvm.conf as below 


Always keep it in mind if your root file system is also lvm please don't forget to add it

devices {
...
filter = [ "a/sdc/", "r/.*/"]


  • After modifying we can verify as below 


root@CTRL:~# grep filter /etc/lvm/lvm.conf |grep -v "#"
    filter = [ "a/sdc/", "r/.*/"] 


  • Now install the storage node components in the controller node ( generally it should be separate node)

root@CTRL:~#  yum install cinder-volume python-mysqldb
Reading package lists... Done
Building dependency tree
Reading state information... Done
python-mysqldb is already the newest version.
The following extra packages will be installed:
  alembic cinder-common ieee-data libconfig-general-perl libgmp10 libibverbs1
  libjs-jquery libjs-sphinxdoc libjs-underscore librabbitmq1 librdmacm1
  libsgutils2-2 libyaml-0-2 python-alembic python-amqp python-amqplib
  python-anyjson python-babel python-babel-localedata python-barbicanclient
  python-cinder python-concurrent.futures python-crypto python-decorator
  python-dns python-ecdsa python-eventlet python-formencode
  python-glanceclient python-greenlet python-httplib2 python-iso8601
  python-json-patch python-json-pointer python-jsonpatch python-jsonschema
  python-keystoneclient python-keystonemiddleware python-kombu
  python-librabbitmq python-lockfile python-lxml python-mako python-markupsafe
  python-migrate python-mock python-netaddr python-networkx python-novaclient
  python-openid python-oslo.config python-oslo.db python-oslo.i18n


  • Edit the cinder configuration file ( /etc/cinder/cinder.conf)  and add the cinder DB url in database session 

[database]
connection = mysql://cinder:Onm0bile@CTRL/cinder

  • Configure the rabbit MQ 

[DEFAULT]
...
rpc_backend = rabbit
rabbit_host = CTRL
rabbit_password = Onm0bile

  •     Configure the identity services 

[DEFAULT]
auth_strategy = keystone
[keystone_authtoken]
auth_uri = http://CTRL:5000/v2.0
identity_uri = http://CTRL:35357
admin_tenant_name = service
admin_user = cinder
admin_password = Onm0bile

  • Update the my_ip as storage node IP ( in this case controller node )


[DEFAULT]
.....
my_ip = 192.168.24.10
  • Configure the image service

[DEFAULT]
....
glance_host = CTRL

  • Enable the verbose mode for troubleshooting purpose 


[DEFAULT]
...
verbose = True

  • Restart the cinder service and iscsi service 

root@CTRL:~# service tgt restart
tgt stop/waiting
tgt start/running, process 18809
root@CTRL:~# service cinder-volume restart
cinder-volume stop/waiting
cinder-volume start/running, process 14432
root@CTRL:~#

Now we need to verify the cinder services


  • Source the admin.rc to access keyston commands 


root@CTRL:~# cat admin.rc
export OS_USERNAME=admin
export OS_PASSWORD=password
export OS_TENANT_NAME=admin
export OS_AUTH_URL=http://CTRL:35357/v2.0
root@CTRL:~# source admin.rc
root@CTRL:~#

  • Verify the cinder services 

root@CTRL:~# cinder service-list
+------------------+-----------+------+---------+-------+----------------------------+-----------------+
|      Binary      |    Host   | Zone |  Status | State |         Updated_at         | Disabled Reason |
+------------------+-----------+------+---------+-------+----------------------------+-----------------+
| cinder-scheduler | CTRL | nova | enabled |   up  | 2017-11-15T18:34:12.000000 |       None      |
|  cinder-volume   |  CTRL | nova | enabled |   up  | 2017-11-15T18:34:17.000000 |       None      |
+------------------+-----------+------+---------+-------+----------------------------+-----------------+
root@CTRL:~#

  • Now access the tuxfixer tanent access to create the test volume 

root@CTRL:~# cat tuxfixer.rc
export OS_USERNAME=tuxfixer
export OS_PASSWORD=tux123
export OS_TENANT_NAME=tuxfixer
export OS_AUTH_URL=http://CTRL:35357/v2.0
root@CTRL:~#
root@CTRL:~# source tuxfixer.rc

  • Create 1 GB volume called tux-vol1

root@CTRL:~# cinder create --display-name tux-vol1 1
+---------------------+--------------------------------------+
|       Property      |                Value                 |
+---------------------+--------------------------------------+
|     attachments     |                  []                  |
|  availability_zone  |                 nova                 |
|       bootable      |                false                 |
|      created_at     |      2017-11 15T18:36:16.155518      |
| display_description |                 None                 |
|     display_name    |              tux-vol1               |
|      encrypted      |                False                 |
|          id         | 252f87d2-e5b4-326c-889ec-6bbee259bc88 |
|       metadata      |                  {}                 |
|         size        |                  1                   |
|     snapshot_id     |                 None                 |
|     source_volid    |                 None                 |
|        status       |               creating               |
|     volume_type     |                 None                 |
+---------------------+--------------------------------------+
root@CTRL:~#

  • List the newly created volume

root@CTRL:~# cinder list
+--------------------------------------+-----------+--------------+------+-------------+----------+-------------+
|                  ID                  |   Status  | Display Name | Size | Volume Type | Bootable | Attached to |
+--------------------------------------+-----------+--------------+------+-------------+----------+-------------+
| 252f87d2-e5b4-326c-889ec-6bbee259bc88| available |  ling-vol1   |  1   |     None    |  false   |             |
+--------------------------------------+-----------+--------------+------+-------------+----------+-------------+
root@OSCTRL-UA:~#

  • Check the lvm details using lvs command 

root@CTRL:~# lvs
  LV                                          VG             Attr      LSize Pool Origin Data%  Move Log Copy%  Convert
  volume-252f87d2-e5b4-326c-889ec-6bbee259bc88 cinder-volumes -wi-a---- 1.00g

We can see the new 1 GB cinder lvm is ready to use for storage purposes


Tuesday, November 7, 2017

Configuring the block storage (cinder) in openstack - controller part

Cinder is the block storage server in openstack configuration . This setup is designed to consume storage devices either from local storage through  LVM or third party devices for the computer node NOVA.

In our case we will use the default LVM as a storage device which will share to the instances which we created earlier . ( as we don't have separate storage node configured we will use controller node as storage) 

The cinder  architecture 


Cinder-API - This is a wsgi based api which will routes and authenticate the requests to the block storage service. It supports openstack API which will call as a cinder client ( Nova EC2 instances also supports this as an alternate)

Cinder -Scheduler - This will schedule the  requests and route it to appropriate volume service as per your configuration .

Cinder Volume - This is the back end storage devices . typically the devices which are supported are given below

  • Ceph RADOS Block Device (RBD)
  • Coraid AoE driver configuration
  • Dell EqualLogic volume driver
  • EMC VMAX iSCSI and FC drivers
  • EMC VNX direct driver
  • EMC XtremIO OpenStack Block Storage driver guide
  • GlusterFS driver
  • HDS HNAS iSCSI and NFS driver
  • HDS HUS iSCSI driver
  • Hitachi storage volume driver
  • HP 3PAR Fibre Channel and iSCSI drivers
  • HP LeftHand/StoreVirtual driver
  • HP MSA Fibre Channel driver
  • Huawei storage driver
  • IBM GPFS volume driver
  • IBM Storwize family and SVC volume driver
  • IBM XIV and DS8000 volume driver
  • LVM
  • NetApp unified driver
  • Nexenta drivers
  • NFS driver
  • ProphetStor Fibre Channel and iSCSI drivers
  • Pure Storage volume driver
  • Sheepdog driver
  • SolidFire
  • VMware VMDK driver
  • Windows iSCSI volume driver
  • XenAPI Storage Manager volume driver
  • XenAPINFS
  • Zadara
  • Oracle ZFSSA iSCSI Driver
Cinder backup - Provides the cinder back up to various targets.

Cinder work flow 


  • A volume is created through the cinder create command. This command creates an LV into the volume group (VG) “cinder-volumes.”
  • The volume is attached to an instance through the nova volume-attach command. This command creates a unique iSCSI IQN that is exposed to the compute node.
  • The compute node, which runs the instance, now has an active iSCSI session and new local storage (usually a /dev/sdX disk).
  • Libvirt uses that local storage as storage for the instance. The instance get a new disk, usually a /dev/vdX disk.

While entering to the configuration side we have two parts for the configuration . 
configuration of the controller side and configuration of the storage node side. But as i mentioned earlier we have no storage node configured separately due to the limitation in my lab and we will configure both in controller node  

Configuring the controller node for cinder setup

  •  Login to the CTRL node as root
  • Create the databases for cinder service 
root@CTRL:~# mysql -u root -p
Enter password:
Welcome to the MySQL monitor.  Commands end with ; or \g.
Your MySQL connection id is 27
Server version: 5.5.44-0ubuntu0.14.04.1 (Ubuntu)

Copyright (c) 2000, 2015, Oracle and/or its affiliates. All rights reserved.

Oracle is a registered trademark of Oracle Corporation and/or its
affiliates. Other names may be trademarks of their respective
owners.

Type 'help;' or '\h' for help. Type '\c' to clear the current input statement.

mysql> CREATE DATABASE cinder;
Query OK, 1 row affected (0.00 sec)
  • Provide the proper access to the cinder database and set the password for the cinder DB.
mysql> GRANT ALL PRIVILEGES ON cinder.* TO 'cinder'@'localhost' IDENTIFIED BY 'Onm0bile';
Query OK, 0 rows affected (0.00 sec)

mysql> GRANT ALL PRIVILEGES ON cinder.* TO 'cinder'@'%'  IDENTIFIED BY 'Onm0bile';
Query OK, 0 rows affected (0.00 sec)

mysql> exit
Bye
root@CTRL:~#

  • Now we need to access the admin commands using source the admin.rc file 
root@CTRL:~# cat admin.rc
export OS_USERNAME=admin
export OS_PASSWORD=password
export OS_TENANT_NAME=admin
export OS_AUTH_URL=http://CTRL:35357/v2.0
root@CTRL:~# source admin.rc
root@CTRL:~#
  • Create the service credentials for cinder using keystone command . We need to create cinder user
root@CTRL:~# keystone user-create --name cinder --pass Onm0bile
+----------+----------------------------------+
| Property |              Value               |
+----------+----------------------------------+
|  email   |                                  |
| enabled  |               True               |
|    id    | c1791460385745f79015a4ee40f94db8 |
|   name   |              cinder              |
| username |              cinder              |
+----------+----------------------------------+
root@CTRL:~#

  • Add admin role to the cinder user 
root@CTRL:~# keystone user-role-add --user cinder --tenant service --role admin
root@CTRL:~#
  • Create the cinder service entities for both cinder API V1 and V2 
(currently the block storage API versions are up to 3 and we will only use 2)

root@CTRL:~# keystone service-create --name cinder --type volume --description "OpenStack Block Storage"
+-------------+----------------------------------+
|   Property  |              Value               |
+-------------+----------------------------------+
| description |     OpenStack Block Storage      |
|   enabled   |               True               |
|      id     | 6c91s86b3acb23d2b1294171c14fed68 |
|     name    |              cinder              |
|     type    |              volume              |
+-------------+----------------------------------+
root@CTRL:~#
root@CTRL:~# keystone service-create --name cinderv2 --type volumev2 --description "OpenStack Block Storage"
+-------------+----------------------------------+
|   Property  |              Value               |
+-------------+----------------------------------+
| description |     OpenStack Block Storage      |
|   enabled   |               True               |
|      id     | 414d7125e8e44314ce58beb8fc4ca781|
|     name    |             cinderv2             |
|     type    |             volumev2             |
+-------------+----------------------------------+
root@OSCTRL-UA:~#

  • Create the API storage end points for version1 and version 2
keystone endpoint-create --service-id $(keystone service-list | awk '/ volume / {print $2}') --publicurl http://CTRL:8776/v1/%\(tenant_id\)s --internalurl http://CTRL:8776/v1/%\(tenant_id\)s --adminurl http://CTRL:8776/v1/%\(tenant_id\)s --region regionOne


keystone endpoint-create --service-id $(keystone service-list | awk '/ volume / {print $2}') --publicurl http://CTRL:8776/v2/%\(tenant_id\)s --internalurl http://CTRL:8776/v2/%\(tenant_id\)s --adminurl http://CTRL:8776/v2/%\(tenant_id\)s --region regionOne


root@CTRL:~# keystone endpoint-create --service-id $(keystone service-list | awk '/ volume / {print $2}') --publicurl http://CTRL:8776/v1/%\(tenant_id\)s --internalurl http://CTRL:8776/v1/%\(tenant_id\)s --adminurl http://CTRL:8776/v1/%\(tenant_id\)s --region regionOne
+-------------+----------------------------------------+
|   Property  |                 Value                  |
+-------------+----------------------------------------+
|   adminurl  | http://CTRL:8776/v1/%(tenant_id)s |
|      id     |    6c91s86b3acb23d2b1294171c14fed68   |
| internalurl | http://CTRL:8776/v1/%(tenant_id)s |
|  publicurl  | http://CTRL:8776/v1/%(tenant_id)s |
|    region   |               regionOne                |
|  service_id |    7a90b86b3aab43d2b1194172a14fed79    |
+-------------+----------------------------------------+
root@CTRL:~#
root@CTRL:~# keystone endpoint-create --service-id $(keystone service-list | awk '/ volumev2 / {print $2}') --publicurl http://CTRL:8776/v1/%\(tenant_id\)s --internalurl http://CTRL:8776/v1/%\(tenant_id\)s --adminurl http://CTRL:8776/v1/%\(tenant_id\)s --region regionOne
+-------------+----------------------------------------+
|   Property  |                 Value                  |
+-------------+----------------------------------------+
|   adminurl  | http://CTRL:8776/v1/%(tenant_id)s |
|      id     |       414d7125e8e44314ce58beb8fc4ca781
| internalurl | http://CTRL:8776/v1/%(tenant_id)s |
|  publicurl  | http://CTRL:8776/v1/%(tenant_id)s |
|    region   |               regionOne                |
|  service_id |    716e7125e8e44414ad58deb9fc4ca682    |
+-------------+----------------------------------------+
root@OSCTRL-UA:~#

  • Next we have to install the cinder components 
root@CTRL:~# yum install cinder-api cinder-scheduler python-cinderclient
Reading package lists... Done
Building dependency tree
Reading state information... Done
python-cinderclient is already the newest version.
python-cinderclient set to manually installed.
The following extra packages will be installed:
  cinder-common python-barbicanclient python-cinder python-networkx
  python-taskflow
Suggested packages:
  python-ceph python-hp3parclient python-scipy python-pydot
The following NEW packages will be installed:
  cinder-api cinder-common cinder-scheduler python-barbicanclient
  python-cinder python-networkx python-taskflow
0 upgraded, 7 newly installed, 0 to remove and 37 not upgraded.
Need to get 1,746 kB of archives.
After this operation, 14.0 MB of additional disk space will be used.
Do you want to continue? [Y/n] y
  • Edit the /etc/cinder/cinder.conf file and configure as below 
Database session 

[database]
connection = mysql://cinder:Onm0bile@CTRL/cinder
Rabbit MQ configuration 

[DEFAULT]
...
rpc_backend = rabbit
rabbit_host = CTRL
rabbit_password = Onm0bile
Update the auth_stratery in default session 

[DEFAULT]
auth_strategy = keystone
Update the keystone credentials 

[keystone_authtoken]
auth_uri = http://CTRL:5000/v2.0
identity_uri = http://CTRL:35357
admin_tenant_name = service
admin_user = cinder
admin_password = Onm0bile
Update the my_ip option to access the management IP of the controller node 

[DEFAULT]
.....
my_ip = 192.168.24.10
Enable the verbose 

[DEFAULT]
.....
verbose = True
Populate the configuration in cinder database 

root@CTRL:~# su -s /bin/sh -c "cinder-manage db sync" cinder
2017-11-07 04:37:00.143 9423 INFO migrate.versioning.api [-] 0 -> 1...
2017-11-07 04:37:00.311 9423 INFO migrate.versioning.api [-] done
2017-11-07 04:37:00.312 9423 INFO migrate.versioning.api [-] 1 -> 2...
2017-11-07 04:37:00.424 9423 INFO migrate.versioning.api [-] done
....out put is omitted....
Restart the cinder services once the database update finishes 

root@CTRL:~# service cinder-scheduler restart
cinder-scheduler stop/waiting
cinder-scheduler start/running, process 9444
root@CTRL:~# service cinder-api restart
cinder-api stop/waiting
cinder-api start/running, process 9466
root@CTRL:~#

I will cover the storage part on next session